Monthly Archives: May 2012

Bannack Best


1. Shootout  B&W
2. 5/24/2012, 3:30 PM
3.Bannack, MT
4. f/5.6
5. 1/100
6. Canon EOS Rebel T3
I loved this capture and knew I had a good shot when I pushed the shutter. The feel was very relaxed and natural, the light was good, and the composition was not bad. Little editing other than exposure, sharpening, and desaturation for black and white.

1. Shootout Sepia
2. 5/24/2012, 3:30 PM
3.Bannack, MT
4. f/5.6
5. 1/150
6. Canon EOS Rebel T3
My very last shot of the shootout. As Sister Esplin called to crap things up, I whispered at the model to look at me. He turned his whole head towards me. I motioned for him to turn back around and then said “just your eyes.” This was my favorite shot of this model and one of my favorites of the day. Post – PS sepia effect.

1. Cards
2. 5/24/2012, 3:30 PM
3.Bannack, MT
4. f/5
5. 1/8
6. Canon EOS Rebel T3
I admit – I have a thing for playing cards. I brought these old, worn looking cards along for this kind of shot. Little editing was done beyond saturation, exposure, and a burned left edge.

1.Truck HDR
2. 5/24/2012, 3:30 PM
3.Bannack, MT
4. f/23
5. 1/250
6. Canon EOS Rebel T3, Tripod
My favorite standard HDR of the trip. Not much to say other than that I played with the sats and contrast/detail levels. I let the picture speak for itself.

1. Shootout Model 1
2. 5/24/2012, 3:30 PM
3.Bannack, MT
4. f/23
5. 1/150
6. Canon EOS Rebel T3, Tripod
My favorite shot of the day. Had to balance the shooting angle with the sun moving fast in order to not blow our the sky. Very little post editing.


Bannack HDR

1. Jars Single Shot HDR
2. 5/24/2012, 3:30 PM
3.Bannack, MT
4. f/23
5. 1/8
6. Canon EOS Rebel T3
I thought these jars had potential when I first saw then, but could not bright it to life until I ran it through Photomatix. The colors, with few modifications, were perfect. I turned up the black point to get rid of some of the boring background.

1. Yellow Truck HDR
2. 5/24/2012, 3:30 PM
3.Bannack, MT
4. f/5.5
5. 1/1000
6. Canon EOS Rebel T3, Tripod
I don’t like faked out looking images, but this one fascinated me. There is so much contrast and fine detail that I could not ignore this photo. Little adjustments outside of a round of HDR processing.


1. Brush Macro
2. 5/24/2012, 3:30 PM
3.Bannack, MT
4. f/–
5. 1/1000
6. Canon EOS Rebel T3, Extension Tubes
Though this is not the most well done shot of the day, I thought it was one of the more interesting. I decided to experiment with macro extension tubes, and this was part of the result. It took me a while to get in close and hand focus, but I was able to get a (mostly) clean shot. The band of focus is TINY in this picture. Without aperature control, I was not able to keep the front most section from blurring, but I did my best. Post editing brought out the beauty of this tiny branch of a shrub.

1. Books
2. 5/24/2012, 3:30 PM
3.Bannack, MT
4. f/4
5. 1/30
6. Canon EOS Rebel T3
I snapped this shot in the sherrif’s house while waiting for another shot to clear out. I thought volume of children’s stories made for an ineresting shot. Little post edits, just small exposure changes and sharpening of the words.

1. Saw Blend
2. 5/24/2012, 3:30 PM
3.Bannack, MT
4. f/36
5. 1/15
6. Canon EOS Rebel T3
Just a simple texture overlay, masked out everywhere except for the blade. Pulled one channel from the wood texture shot (obtained via spacer ring) and layered it with fairly high transparency levels. A quick mask job finished the project.


Reverse Shallow Depth of Feild

1. Forground/Background Focus
2. 5/24/2012, 3:30 PM
3.Bannack, MT
4. f/5.6
5. 1/100
6. Canon EOS Rebel T3
While taking the shots of the model holding the gun, I discovered an opportunity to catch an interesting shot. I got close to the gun and focused in on the barrel. In post, I was able to sharpen the model’s eyes and classes in the background shot, and sharpen the barrel opening in the foreground image. I think the contrast gives a unique perspective on how focus can change our perception.


Bannack – Action Blur and Freeze

1. Blur Shot / Ghost Shot
2. 5/24/2012, 3:30 PM
3.Bannack, MT
4. f/22.0
5. 0.6
6. Canon EOS Rebel T3, Tripod
Simple ghost shot. The model moved on my count during a slow shutter speed shot. Lots of edits to set the mood. CR edits to cool the photo, tame sunshine through windows, darken the back hallway, burn the edges, and brighten and blur further the “ghost.” The hallway was actually very unremarkable and was not the least bit creepy looking, and I intended to change that to fit the theme.

1. Frozen Shot / Merry go Round
2. 5/24/2012, 3:30 PM
3.Bannack, MT
4. f/4.5
5. 1/500
6. Canon EOS Rebel T3
The object here was to capture clearly the moment of this model on the merry go round. He was determined to stand as the merry go round was spinning. This shot captured his attempt. CR edits to cool the bright sunshine. I left the photo overly green to give a surreal feel to the moment.


Bannack – Portraits

1. Shootout Model 1
2. 5/24/2012, 3:30 PM
3.Bannack, MT
4. f/5.6
5. 1/100
6. Canon EOS Rebel T3
This was my favorite photo from this model. The light was dramatic and the pose seemed less posed than most photos. I angles myself to get a soft angle towards her face and to be able to capture the window without the people on the other side shooting in at her. Edits in CR to adjust exposure on light and dark spots, and a small amount of PS work to remove blemishes, fuzzies, and unsharp eyes.

1. Shootout Model 2
2. 5/24/2012, 3:30 PM
3.Bannack, MT
4. f/5.6
5. 1/400
6. Canon EOS Rebel T3
Most of my shots of this model were composed poorly because of the tight space restrictions and many people shooting. This was my favorite because I was able to compose the shot nicely, frame our distracting objects, capture interesting backgrounds, and snap a shot at the right moment. Editing in CR for exposures and colors, and editing in PS for eye accents.

Portraits

Individual Side Comp

1. Hal
2. 5/20/2012, 8 PM
3. Blackfoot, ID
4. f/5.6
5. 1/100
6. Canon EOS Rebel T3, Tripod.
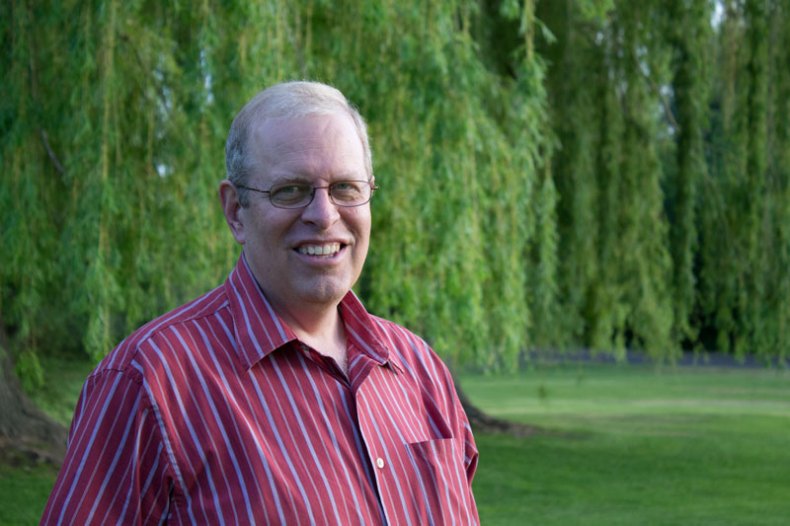
I snapped this picture of Hal, my father in law, before he was quite ready and giving me overly faked smiles. There was something about his face that made me like this picture, some kind of seriousness that I don’t often see out of him. I attempted to bring that out with the temperature of the picture. As a smart object, I kicked back and forth between PS and CR. The temperature was cooled, the burned edge was added, and as a final touch I used a brush in camera raw to lower the exposure on the brighter parts of his face.
Head or Head and Shoulders

1. Hal – Head and Shoulders
2. 5/20/2012, 8 PM
3. Blackfoot, ID
4. f/5.6
5. 1/100
6. Canon EOS Rebel T3, Tripod.
This shot is much more representative of my father in law. I got rid of the serious feel of the previous picture and made it more warm and inviting. I sharpened his eyes a touch, and I used the brush in CR to lower the exposure of his face on the bright side. I kept this edit as simple as possible.
Individual – Full Body

1. Connie – Full Body
2. 5/20/2012, 8 PM
3. Blackfoot, ID
4. f/5.6
5. 1/160
6. Canon EOS Rebel T3, Tripod.
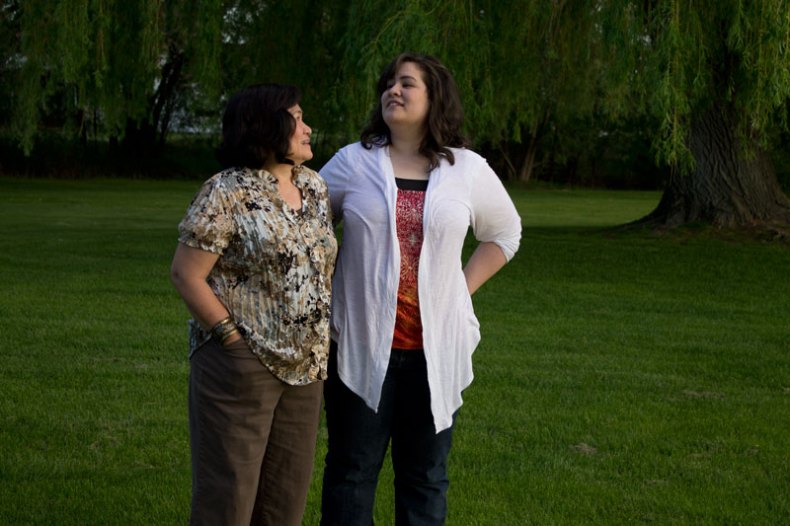
I had a hard time finding a full body shot that I liked of anyone. I had little time this week for a photoshoot, and was limited to a three hour break in between work and other responsibilities over the weekend. (These shots outside actually occurred during the eclipse.) I found my mother in law Connie being sassy to my wife Melissa about something or other before I was “ready” to shoot. The picture seemed unposed and much more natural than my other shots. Burned edges, temperature adjustments and exposure were all that I changed to counteract the still bright sun.
Group Activity
1. Movie Night
2. 5/20/2012, 10 PM
3. Idaho Falls, ID
4. f/5.6
5. 1/4
6. Canon EOS Rebel T3, Tripod.
My group activity pictures from the weekend photoshoot did not turn out well at all. Everything looked fake because people were too aware that the camera was on them. I opted to find a different shot once I saw the photos on my computer. The problem? 10 PM that night. My sister and brother in law were upstairs watching a movie, so I took this as an opportunity. My sister had a migrane, but still wanted to see the movie. I sat down with the camera after I had told them I would be taking their pictures and I waited until the movie took the focus away from me before beginning to snap away. The facial expressions in this shot show how into the movie Tyrel was and how poor my sister felt.  I used a longer shutter length to brighten up the dark room and then midly warmed the picture in CR. A light burned edge moved the focus from the light switch to the real focal point.
Group Posed

1. Hal and Connie
2. 5/20/2012, 8 PM
3. Blackfoot, ID
4. f/5.6
5. 1/100
6. Canon EOS Rebel T3, Tripod.
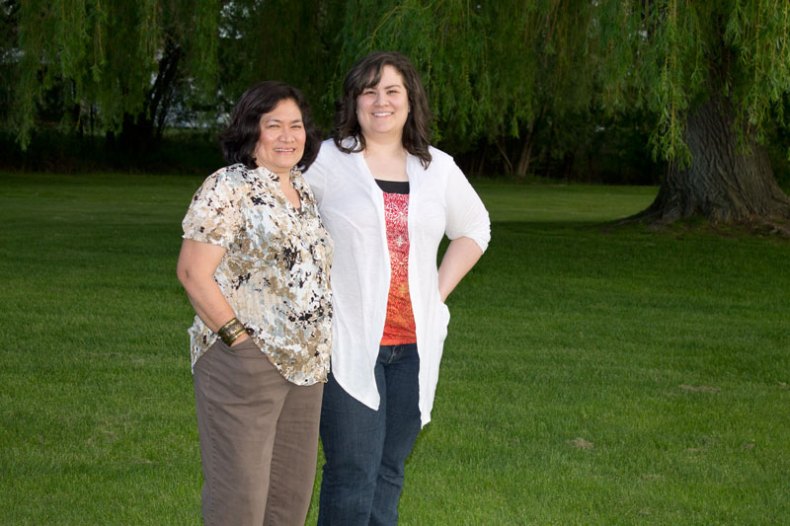
Most of these shots did not turn out well, as the poses seemed too posed. This one is somewhat cheesy, but my wife loved it. It was certainly the best of this group. I warmed the photo up in CR and adjusted the colors to bring out the green. I then added a burned edge (which is MUCH lighter in my final photos, this “web optimized” picture makes the burned edge look far too obvious. I need to figure that one out still.)
Group Environmental
1. Connie and Carter
2. 5/13/2012, 7 PM
3. Blackfoot, ID
4. f/5.6
5. 1/100
6. Canon EOS Rebel T3, Tripod.
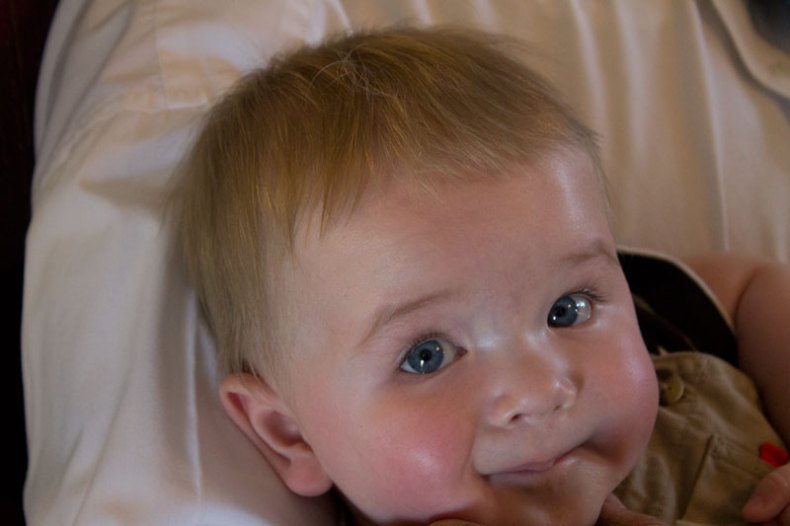
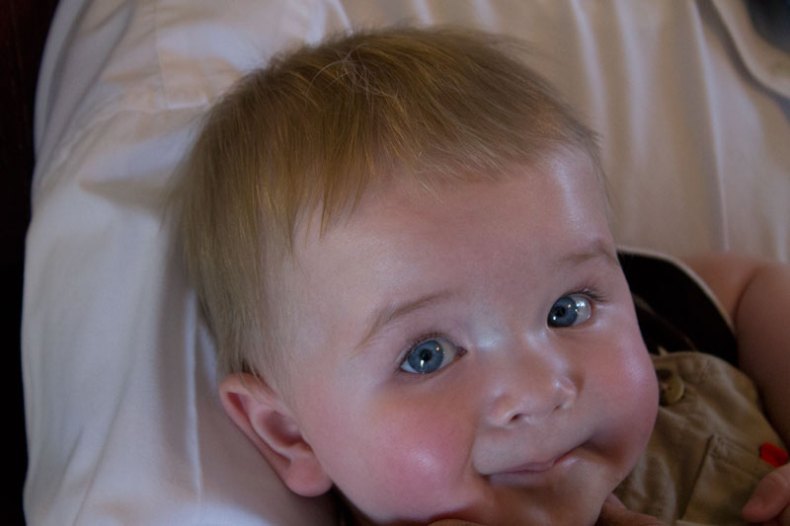
This is my mother in law with my nephew. Connie runs a daycare and this is what she does day in and day out. She adores her first grandson, and this is on of many pictures of the two of them that turned out great, I cooled the picture down just a touch to get rid of the yellowish indoor light. I did a few touchups to Carter, including sharpening his eyes and removing a rather large stream of drool that became more and more prominent as I took this series of pictures.

Portrait Edits

Portrait Enhancements

Edit
ImageOriginal

Image

1. Carter
2. 5/13/2012, 7 PM
3. Blackfoot, ID
4. f/5.6
5. 1/80
6. Canon EOS Rebel T3, Tripod.
I tried to keep this edit simple. After a few minor adjustents in Camera Raw, I tinkered a but in Photoshop. The first thing I did was an adjustment mask for Carter’s eyes. I sharpened them, increased the contrast, and increased the exposure. From there, I used the clone stamp, the clone brush, the healing brush, and the spot healing tool to remove some minor imperfections. I removed some veins showing through Carter’s thin skin, touched up his somewhat wild eyebrows, and cleaned up little spots where he had the standard issue baby “goop” on his face.

Match color

Edit
Image


Original

Image


Color Match Source

Image


1. Melissa and Mom
2. 5/20/2012, 7:30 PM
3. Blackfoot, ID
4. f/5.6
5. 1/200
6. Canon EOS Rebel T3, Tripod.
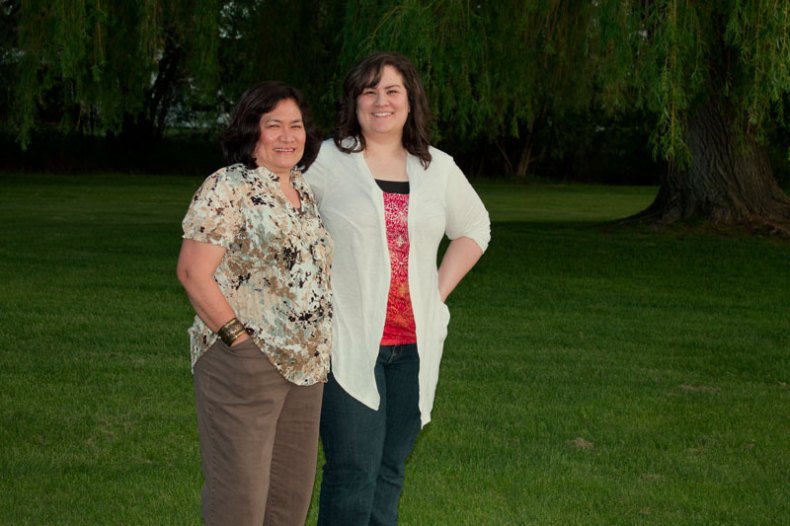
While snapping one of the few pictures of my Wife (who did not want to be on camera) I switched to the auto portrait setting on my camera. This was a mistake, and the flash engaged and washed out a lot of the color. As this was one of the only good shots, I tried the color match feature. While not perfect, the color change is apparent and makes a large difference.
Color Replacement
Edit
Image


Original

Image


1. Hal 1
2. 5/20/2012, 7:45 PM
3. Blackfoot, ID
4. f/5.6
5. 1/100
6. Canon EOS Rebel T3, Tripod.
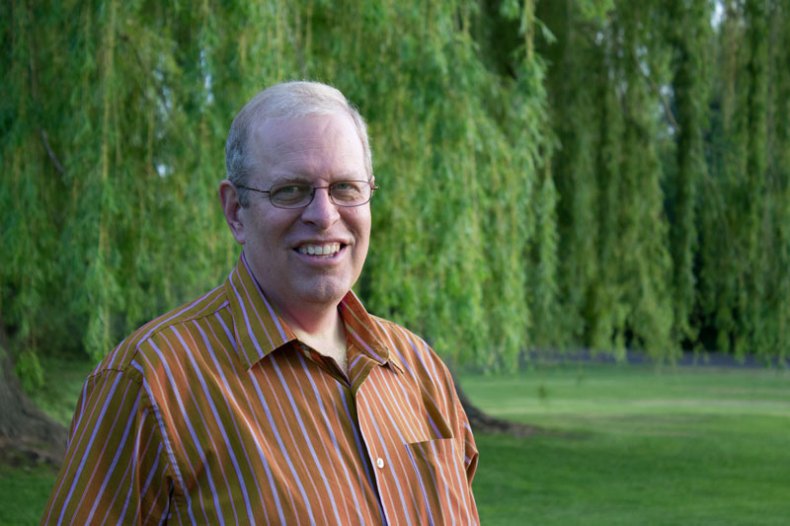
I did not have many good photos for a color replacement, so I used a photo that did not quite make the cut for the other post as Hal’s shirt made an excellent target for color replacement. This was done using a simple adjustment mask. I played with the hue of the entire picture, and then erased the mask except for his shirt. This allowed the rest of the picture (particularly his face) to remain natural, but for his shirt to change to orange.

Camera Raw Edits

Edit #1


1. Lock
2. 5/9/2012, 9 PM
3. Idaho Falls, ID
4. f/5.0
5. 1/60
6. Canon EOS Rebel T3, Tripod.
I saw this rusty lock and chain after most of the good light was gone on a short photography expedition. I dropped everything and snapped a few shots, which turned out to be my favorites from the trip. This photo is edited entirely in Camera Raw. I darkened the image up and brought out some of the colors. I then used a brush to increase the exposure on the chain and lock, and then to lessen the sharpness on the background. Last, I used a brush to add burned edges with lower exposure.
Edit #2

1. Reflection
2. 5/9/2012, 8:30 PM
3. Idaho Falls, ID
4. f/22.0
5. 1/25
6. Canon EOS Rebel T3, Tripod.
This shot breaks a standard photography rule to achieve an end goal. As you can clearly see, I shot directly into the sun. This was a striking view to my eye, and I hoped to be able to capture it on camera. As expected, the colors were washed out and the sky was blown out. I used Camera Raw to first cool the image off a touch, then to lower the exposure. I played with contrast and clarity to bring out the lowlights and the ripples in the water. I then used a brush to lower the exposure of the sky and sun. I painted over each section of background so that the foreground was not overwhelmed. The sky is still blown out, and I will never be able to get the color there, but the sky was not the focus. The reflection, the dramatic lighting through the trees, and the gleaming sun were the priorities in this shot.
Challenge Shot
 

1. Sign
2. 5/9/2012, 8:45 PM
3. Idaho Falls, ID
4. f/25.0
5. 1/25
6. Canon EOS Rebel T3, Tripod.
Another shot on the way back from the photo excursion this week. The good light was mostly gone, so I set up my tripod and took a longer shot than normal to compensate. I shot this shot as a RAW file and edited it in Camera Raw. I brightened up the exposure, turned down the saturation on the eerily green grass, added a tiny bit of contrast, and added a simply burned edge using exposure and a brush. This photo did not require much editing other than the small amount to compensate for the dim light. The photo was saved as a Smart Object to go back and forth between CR and PS.

Panoramas

Panorama #1

1. Path

2. 5/9/2012, 8 PM
3. Idaho Falls, ID
4. f/4.5
5. 1/60
6. Canon EOS Rebel T3, Tripod.
This shot was much harder to capture the way my eye saw it than I expected. The tunnel look I hoped to capture simply did not exist in the photos, but I tried to bring it out anyway. This photo takes little explanation. I took three shots from the ground up and stitched them together automatically in Photoshop. I used Content Aware fill to patch up the holes left from the distortion correction. I then made basic edits in Camera Raw. I added a slight burned edge effect in Camera Raw using brushes and adjusting the exposure level.
Panorama #2

1. Train
2. 5/13/2012, 8:45 PM
3. Idaho Falls, ID
4. f/5.6
5. 1/125
6. Canon EOS Rebel T3, Tripod.
This shot, I will be honest, was rushed. I had been attempting to get a shot of this train parked about 2 blocks from my house all week, but whenever I was able to take pictures the sun was out and glaring bright. Tonight, as I came home from my inlaws, it dawned on me that the light was just about perfect. I hoped out of my car with my camera and covered the distance across a field to get to the train before the cool lighting vanished. As this was not really expected to be a part of my blog, but rather just a random chance for a cool shot, I left my camera on auto exposure as I took a quick pano. This caused the ground in the last two frames to darken WAY too much. When I stitched everything together in Photoshop, the end look, no matter how flawed, looked too stunning for me not to use. (My other panos were mediocre at best, though the did not have the exposure issue.)  This panorama is composed of 8 shots. THIS LINK contains a larger version on my personal website, as the one above is tiny because of the length of the shot.  In Camera Raw, I used the brush tool with the exposure setting to make a more natural transition into the darker right frames. Previously the transitions were abrupt and terribly obvious. I used CR to brighten up the sunset a touch. I went back to Photoshop to use CA to fill the missing sections (which was a terrible experience, my worst so far.) I had to play for a very long time to avoid duplicating powerlines, railroad tracks, and bars. The finishing touches were done with the clone stamp. The final edit is not as refined as I would like, but it was a great learning experience.